Trying to rock out, but keep getting stuck on the same track? Having trouble watching your favorite movie, or playing your favorite game?
When disc-based media gets dirty, it can causing skipping and other performance issues, and in some cases, it can get so bad that it makes the disc unusable. When dirt is left in place, it doesn’t improve the situation, in fact it’ll only make it worse. When you leave dust, dirt and other grime to coat your discs, not only will the playback suffer, it may also lead to scratches and more permanent damage. The only way to keep your CD’s, DVD’s and BLU-RAY Discs in top condition is to clean them on a regular basis, with a safe and effective technique.
When you do, the surface will remain pristine, and you’ll never experience any skipping or other problems using the disc. When you don’t, you’re guaranteed to have trouble at some point, it’s just a question of when, and how bad it’ll be. Some dirty discs will play just fine, while others may skip and stutter the whole time. In other situations the disc may not play at all, or if it does load, it may just show an error.
One thing is for sure, if your CD, DVD or BLU-RAY disc is not working correctly, there’s a good chance it’s just dirty. If you give it a good cleaning you’ll probably be able to fix the problem, and if you don’t clean it, the problem will persist, and could even get worse over time. Use the info below to learn about the different ways to clean CD’s, DVD’s and other media discs, and then decide which method will work best for you. The sooner you start treating your discs with proper care, the better off they will be.
What Happens When Discs Get Dirty?
When CDs and DVDs get dirty, several issues can arise, affecting their performance and readability. Here are the common problems that occur when optical discs become dirty:
- Reduced Readability: Dirt, dust, smudges, and fingerprints on the disc’s surface can obstruct the laser beam’s path in CD and DVD drives. This can result in difficulty reading or playing the disc, causing skips, stutters, or freezing during playback.
- Data Corruption: Contaminants on the disc’s surface can lead to data corruption. Even small particles or smudges can interfere with the precise reading of data pits and lands, potentially causing data errors or rendering the disc unreadable.
- Decreased Lifespan: Accumulated dirt and contaminants on the disc’s surface may lead to long-term damage, potentially reducing the disc’s lifespan. This can result in permanent data loss or a decreased ability to read the disc.
- Scratches: Besides dirt and smudges, discs can also develop scratches. Scratches can physically damage the disc’s data layer, leading to data loss and a decrease in readability.
- Playability Issues: Dirty discs may not play in all CD and DVD drives or players because some players are more forgiving of surface contaminants than others. A disc that plays fine in one player may have difficulty in another.
- Noise and Audio Distortion: Dirty discs can cause audio distortion, noise, or pops during playback, affecting the listening experience.
To prevent these issues, it’s essential to handle and store CDs and DVDs carefully, always holding them by the edges to prevent smudges and fingerprints. Additionally, storing discs in protective cases when not in use helps minimize exposure to contaminants.
Regular cleaning of optical discs with a soft, lint-free cloth or microfiber cloth can help maintain their performance and extend their lifespan. More severe issues, such as deep scratches or damage, may require professional disc repair services to fully restore playability.
The Best Way To Clean CD’s, DVD’s and BLU-RAY Discs
There’s more than one way to get a dirty disc clean, but not every method will be a good choice. When deciding which technique or tool to use, it’s important to consider several factors. You may not have every tool or product on hand, and you may not have the time or patience for certain cleaning methods. Most of us will prefer to get the job done quickly and efficiently, but if you have deep scratching and more severe dirt build-up, a quick cleaning may not do the trick.
For most people the technique below will be the best option to try first, but you’ll need to get a good quality microfiber cloth if you don’t already have one. If you don’t have a good cloth yet, and you can’t wait to get started, check out some of the other methods that follow. They may not be as fool-proof or universally effective, but you may already have the stuff on hand at home to try them. Although we would consider this first cleaning technique the best option for most people, you may prefer to try one of the other commonly used cleaning methods instead, so continue reading for details about every way possible to clean a dirty CD or DVD.
It’s important to clean CDs and DVDs properly to prevent damage to the discs. Follow these steps to clean CDs and DVDs effectively:
Materials You’ll Need:
- High Quality Microfiber Cloth
- Isopropyl alcohol (at least 90% purity)
- Distilled water
- Cotton swabs (optional)
Steps to Clean CDs and DVDs:
- Inspect the Disc: Examine the CD or DVD for any visible smudges, fingerprints, or dirt. Hold it by the edges to avoid touching the surface.
- Blow Away Loose Dust: Use a can of compressed air or simply blow gently across the disc’s surface to remove loose dust particles. This step helps prevent scratching when you clean the disc.
- Prepare Cleaning Solution: In a small bowl or container, mix a solution of isopropyl alcohol and distilled water. You can use a 1:1 ratio, but some people prefer a more diluted solution, such as 1 part alcohol to 3 parts water.
- Dampen the Cloth: Moisten a microfiber or lint-free cloth with the cleaning solution. Ensure the cloth is not dripping wet, but rather damp.
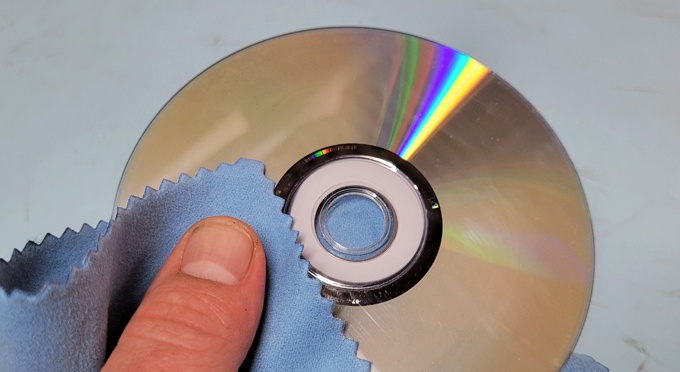
- Wipe Gently: Hold the CD or DVD by the edges, and using the damp cloth, gently wipe the disc’s surface in a straight line from the center to the edge. Do not use circular motions, as this can lead to more scratches.
- Dry with Another Cloth: After cleaning, use a dry, clean microfiber or lint-free cloth to gently pat the disc dry. Again, use straight-line motions from the center to the edge.
- Inspect for Remaining Dirt: If there are still spots or dirt on the disc, you can try cleaning those areas with a cotton swab lightly moistened with the cleaning solution. Be gentle and use a straight-line motion.
- Allow to Air Dry: If any moisture remains, allow the disc to air dry completely before attempting to play it. This usually takes just a few minutes.
Tips For Safe and Effective CD and DVD Cleaning
- Always handle discs by the edges to avoid touching the playing surface.
- Do not use abrasive materials, such as paper towels or tissues, which can scratch the surface.
- Do not use household cleaning products like window cleaner or abrasive chemicals, as they can damage the disc.
- Do not use excessive force when cleaning, as this can cause further damage.
- If a disc is severely scratched or damaged, professional disc repair services may be necessary.
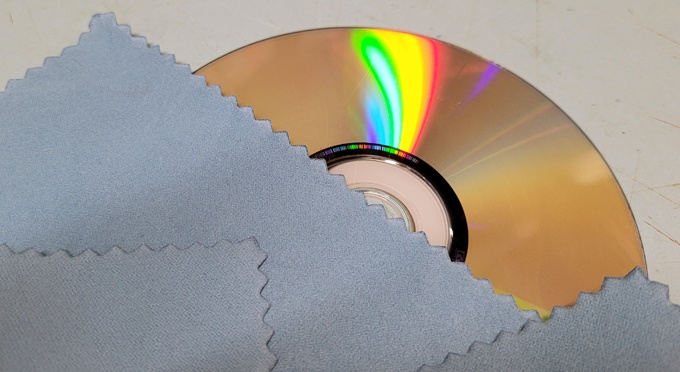
Properly cleaning your CDs and DVDs can help maintain their quality and extend their lifespan, ensuring that you can enjoy your favorite media for years to come. With this simple method you’ll be able to remove all of the dirt and grime without any risk of damage. You don’t want to use a regular cotton rag, or a T-shirt to do the wiping. If you want great results with ease, you’ll need to use a high quality microfiber cloth.
Why Use Microfiber Cloth?
There are no chemicals to use or special steps to take. Forget about special cleaning sprays or chemically treated wipes. All you need is this remarkable cleaning cloth to remove fine scratches, fingerprints, smudges, dirt and dust from any disc. No other cloth works better to clean CD’s and DVD’s, but you can also use them any other sensitive surface in your home, office or vehicle. Our high quality cleaning cloths enable you to remove all of the build-up without any risk of harming the surface. With just a quick swipe, a damp cloth will leave your discs clean, streak-free and polished. Use the cloth dry for dusting and polishing, or use it damp for cleaning.
These cloths work so well, they not only remove the dirt you can see, but they also remove 98% of the bacteria and germs not visible to the naked eye. A static charge is also built up when you use these cloths, so dirt, dust and micro-particles are actually drawn in toward the cloth, and then held by the fibers. This makes it even easier to clean your CD’s and DVD’s. Using a microfiber cloth is often considered the best option for cleaning CDs and DVDs for several reasons:
- Lint-Free Cleaning: Microfiber cloths are designed to be lint-free, which means they won’t leave behind tiny fibers or particles on the disc’s surface. Lint from other types of cloths or materials can potentially interfere with the laser pickup in optical drives, affecting the disc’s performance.
- Gentle Cleaning: Microfiber is a very soft and gentle material. When used properly, it won’t scratch or damage the delicate surface of optical discs. This is especially important because CDs and DVDs have sensitive data layers that should be protected.
- Effective Cleaning: Microfiber’s fine fibers are highly effective at trapping and removing smudges, fingerprints, and other contaminants from the disc’s surface. This makes it efficient at cleaning without the need for excessive pressure.
- Absorbent: Microfiber is absorbent and can easily hold moisture. When used damp (with water or a cleaning solution), it can effectively clean and remove smudges without excessive moisture, reducing the risk of damage to the disc.
- Versatility: Microfiber cloths are versatile and can be used for various cleaning tasks beyond optical discs, making them a handy cleaning tool to have around.
- Reusable: Microfiber cloths are durable and can be reused many times after washing. This makes them an environmentally friendly and cost-effective choice.
When using a microfiber cloth to clean CDs and DVDs, it’s important to handle the discs by the edges to prevent smudges and fingerprints on the playing surface. Always use a clean, dry or slightly damp microfiber cloth, and wipe the disc in straight lines from the center to the outer edge to avoid introducing new scratches. Proper handling and the use of a microfiber cloth can help maintain the optical disc’s integrity and readability.
Does Quality Matter?
Yes, the quality of a microfiber cloth can significantly impact its effectiveness for various cleaning tasks, including cleaning CDs and DVDs. The key factors to consider regarding the quality of a microfiber cloth are:
- Fiber Density: Higher-quality microfiber cloths tend to have a denser concentration of fibers. This density allows the cloth to trap and hold more dirt, dust, and contaminants effectively. It also contributes to the cloth’s softness, which is crucial for gentle cleaning of delicate surfaces like optical discs.
- Fiber Size: The size of the microfiber fibers can affect their ability to clean and trap particles. Finer, smaller fibers are generally more effective at removing smudges, fingerprints, and contaminants without scratching the surface.
- Construction: Quality microfiber cloths are typically well-constructed to prevent fraying and ensure durability. They have reinforced edges to resist wear and tear, making them more suitable for long-term use.
- Lint-Free: High-quality microfiber cloths are designed to be lint-free. This is especially important for optical discs, as lint or fibers left on the disc’s surface can interfere with disc playback and reading.
- Absorbency: Quality microfiber cloths have good absorbency, which is important if you choose to use them damp with water or cleaning solutions. They should be capable of holding moisture without becoming overly wet.
- Reusable and Easy to Care For: Quality microfiber cloths are durable and designed to withstand multiple uses. They can be easily cleaned by machine washing and air drying without compromising their cleaning performance.
When selecting a microfiber cloth for cleaning CDs and DVDs, it’s advisable to choose a reputable brand or source known for high-quality cleaning products. Look for cloths labeled as suitable for electronics or delicate surfaces. Investing in a quality microfiber cloth can help ensure effective and safe cleaning without damaging the disc’s surface. If you get one somewhere else, you’ll be taking a risk, and it may not work as indicated. When you get our high quality cleaning cloth instead, you’ll be guaranteed to get the results you want.
Other Ways To Clean CD’s, DVD’s and BLU-RAY Discs
Cleaning CDs, DVDs, and Blu-rays requires care to prevent damage to the disc’s surface. Here are some alternative methods people use to clean optical discs:
Cleaning Discs With a Commercial Disc Cleaning Kit
Many stores offer commercial disc cleaning kits that include a cleaning solution and a specialized cleaning cloth or brush designed for optical discs.
Commercial disc cleaning kits are specialized products designed to clean and restore optical discs like CDs, DVDs, and Blu-rays. These kits typically include cleaning solutions and various tools to remove smudges, scratches, and other contaminants from the disc’s surface. When using one, you should follow the kit’s instructions carefully. Here’s more information about commercial disc cleaning kits:
Components of Commercial Disc Cleaning Kits:
- Cleaning Solution: The core component of a commercial disc cleaning kit is the cleaning solution. This solution is formulated to safely and effectively remove smudges, fingerprints, dirt, and other contaminants from the disc’s surface.
- Cleaning Cloths or Pads: Most kits include specialized lint-free cleaning cloths or pads. These are designed to work with the cleaning solution to gently clean the disc’s surface without causing scratches.
- Scratch Remover or Repair Compound: Some kits come with a scratch remover or repair compound. This is used to address minor scratches and surface imperfections, improving the disc’s readability.
- Cleaning Applicators: Many kits provide applicators like brushes or pads that facilitate the even distribution of the cleaning solution and help remove contaminants more effectively.
- Storage Cases: Some kits include disc storage cases or sleeves to help protect and store the cleaned discs properly.
How to Use Commercial Disc Cleaning Kits:
The specific instructions for using a commercial disc cleaning kit may vary depending on the brand and model. However, the general process involves the following steps:
- Inspect the Disc: Examine the optical disc for visible smudges, fingerprints, scratches, or other contaminants. Hold it by the edges to avoid touching the playing surface.
- Apply the Cleaning Solution: Follow the kit’s instructions to apply the cleaning solution to the disc’s surface. Typically, you’ll use a cloth or applicator to distribute the solution evenly.
- Clean Gently: Use the provided cleaning cloth or pad to gently wipe the disc’s surface in straight lines from the center to the edge. Avoid using circular motions, as they can potentially cause more scratches.
- Address Scratches (if applicable): If the kit includes a scratch remover or repair compound, follow the provided instructions to apply and use it. This step is optional and is mainly for discs with minor scratches.
- Rinse and Dry (if required): Some kits may require rinsing the disc with clean water to remove any residue. Others may not require rinsing. Ensure you follow the kit’s specific guidelines.
- Dry and Inspect: Pat the disc dry with a clean, lint-free cloth and inspect it for any remaining issues. If needed, you can repeat the cleaning process for specific problem areas.
Commercial disc cleaning kits offer a comprehensive and convenient solution for maintaining and restoring the quality of optical discs. They are designed to address a range of issues, from smudges and fingerprints to minor scratches. Always follow the instructions provided with the kit to ensure proper use and to avoid any potential damage to the disc.
Cleaning Discs With Warm Water and Mild Soap
Some people use a mixture of warm water and a small amount of mild dish soap. Dip a soft cloth or microfiber cloth into the solution, wring it out thoroughly, and gently wipe the disc’s surface, then rinse with clean water and pat dry. Using a mild dish soap and water solution can be an effective and safe method for cleaning optical discs like CDs, DVDs, and Blu-rays. Here’s a detailed guide on how to use soap and water to do the job:
Materials You’ll Need:
- Mild dish soap (non-abrasive and without additives like bleach)
- Lukewarm water
- Clean, lint-free cloth
- Optical disc with smudges, fingerprints, or minor surface contaminants
Steps to Use Soap and Water to Clean a Disc:
- Inspect the Disc: Examine the optical disc for visible smudges, fingerprints, or minor scratches. Hold it by the edges to avoid touching the playing surface.
- Blow Away Loose Dust: Use a can of compressed air or gently blow across the disc’s surface to remove any loose dust particles. This step helps prevent additional scratches during cleaning.
- Prepare the Soap and Water Solution: Fill a small container or bowl with lukewarm water and add a small amount of mild dish soap. Mix the solution until it forms a gentle, soapy mixture.
- Dampen the Cloth: Moisten a clean, lint-free cloth with the soap and water solution. Ensure that the cloth is not dripping wet but is evenly dampened.
- Wipe Gently: Hold the optical disc by the edges and, using the damp cloth, gently wipe the disc’s surface in a straight line from the center to the outer edge. Do not use circular motions, as they can potentially cause more scratches.
- Rinse with Water: After cleaning, rinse the disc thoroughly with lukewarm water to remove any soap residue. Hold the disc by the edges and use your fingers to gently wash away the soap.
- Pat Dry: Pat the disc dry using a clean, lint-free cloth. Use straight-line motions from the center to the edge.
- Inspect for Remaining Smudges: After cleaning and drying, check the disc for any remaining smudges or contaminants. If needed, you can repeat the process for specific problem areas.
- Allow to Air Dry: If any moisture remains on the disc, allow it to air dry completely before attempting to play it. This usually takes just a few minutes.
Tips for Using Soap and Water:
- Always handle the optical disc by the edges to prevent fingerprints and smudges.
- Use a clean, lint-free cloth to avoid leaving behind lint or debris on the disc’s surface.
- Use a mild dish soap that does not contain abrasive additives or bleach.
- Be patient and gentle during the cleaning process, and avoid excessive pressure to prevent further scratching.
Soap and water can be a gentle and effective method for cleaning optical discs with smudges or minor surface contaminants. However, for severely scratched or damaged discs, professional disc repair services may be necessary to fully restore playback quality.
Cleaning Discs With Toothpaste
A small amount of toothpaste (non-gel, non-abrasive) can be applied to a soft cloth and used to clean discs. Rub gently in straight lines from the center to the edge, then rinse with water and pat dry. Toothpaste can be used as a DIY cleaning solution to remove minor scratches and smudges from optical discs, such as CDs, DVDs, and Blu-rays. Here’s a detailed guide on using toothpaste for cleaning these discs:
Materials You’ll Need:
- Non-gel, non-abrasive toothpaste (white toothpaste without added whitening or abrasive particles)
- Clean, lint-free cloth
- Optical disc with minor scratches or smudges
- Water (for rinsing)
Steps to Use Toothpaste to Clean a Disc:
- Inspect the Disc: Examine the optical disc for visible smudges, fingerprints, or minor scratches. Hold it by the edges to avoid touching the playing surface.
- Blow Away Loose Dust: Use a can of compressed air or gently blow across the disc’s surface to remove any loose dust particles. This step helps prevent additional scratches during cleaning.
- Prepare a Small Amount of Toothpaste: Squeeze a small amount (about the size of a pea) of non-gel, non-abrasive toothpaste onto your finger. Ensure that the toothpaste doesn’t contain abrasive particles, as these can damage the disc’s surface.
- Apply Toothpaste to the Disc: Gently rub the toothpaste onto the smudged or scratched areas of the disc using your fingertip. Be careful not to apply excessive pressure. Keep the motion straight and from the center of the disc toward the outer edge.
- Let It Sit: Allow the toothpaste to sit on the disc for a minute or two. This gives it time to work on the smudges or scratches.
- Rinse with Water: After letting the toothpaste sit, rinse the disc thoroughly with lukewarm water. Hold the disc by the edges and use your fingers to gently wash away the toothpaste residue. Be sure to rinse off all the toothpaste.
- Dry with a Cloth: Pat the disc dry using a clean, lint-free cloth. Use straight-line motions from the center to the edge.
- Inspect for Remaining Issues: After cleaning and drying, check the disc for any remaining smudges or scratches. If needed, you can repeat the process for specific problem areas.
- Allow to Air Dry: If any moisture remains on the disc, allow it to air dry completely before attempting to play it. This typically takes just a few minutes.
Tips for Using Toothpaste:
- Always handle the optical disc by the edges to prevent fingerprints and smudges.
- Use a clean, lint-free cloth to avoid leaving behind lint or debris on the disc’s surface.
- Avoid using abrasive or gritty toothpaste, as these can cause additional damage.
- Be patient and gentle during the toothpaste cleaning process. Avoid excessive pressure to prevent further scratching.
Toothpaste can be an effective DIY solution for cleaning optical discs when used correctly. It’s particularly useful for minor scratches and smudges. However, for severely scratched or damaged discs, professional disc repair services may be necessary to fully restore playback quality.
Cleaning Discs With White Vinegar
A mixture of white vinegar and water (equal parts) can be used to clean discs. Dampen a soft cloth, wipe the disc’s surface gently, and then rinse with clean water, and pat dry. White vinegar can be an effective and natural cleaning solution for removing smudges, fingerprints, and light surface contaminants from CDs, DVDs, and Blu-rays. Here’s a detailed guide on using white vinegar for cleaning optical discs:
Materials You’ll Need:
- White vinegar
- Distilled water
- Clean, lint-free cloth
- Optical disc with smudges or minor surface contaminants
Steps to Use White Vinegar to Clean a Disc:
- Prepare the Cleaning Solution: Mix a cleaning solution using equal parts of white vinegar and distilled water. For example, you can combine one tablespoon of white vinegar with one tablespoon of distilled water. This solution helps break down smudges and contaminants without causing damage to the disc’s surface.
- Inspect the Disc: Examine the optical disc for visible smudges, fingerprints, or minor scratches. Hold it by the edges to avoid touching the playing surface.
- Blow Away Loose Dust: Use a can of compressed air or gently blow across the disc’s surface to remove any loose dust particles. This step helps prevent additional scratches during cleaning.
- Dampen the Cloth: Moisten a clean, lint-free cloth with the white vinegar and distilled water solution. Ensure that the cloth is not dripping wet but is evenly dampened.
- Wipe Gently: Hold the optical disc by the edges and, using the damp cloth, gently wipe the disc’s surface in a straight line from the center to the outer edge. Do not use circular motions, as they can potentially cause more scratches.
- Dry with Another Cloth: After cleaning, use a separate clean, dry cloth to gently pat the disc dry. Again, use straight-line motions from the center to the edge.
- Inspect for Remaining Smudges: If there are still visible smudges or contaminants on the disc, you can reapply the solution and repeat the cleaning process.
- Allow to Air Dry: If any moisture remains on the disc, allow it to air dry completely before attempting to play it. This usually takes just a few minutes.
Tips for Using White Vinegar:
- Always handle the optical disc by the edges to prevent fingerprints and smudges.
- Avoid using excessive pressure when cleaning, as it can lead to further damage.
- Use a clean, lint-free cloth to avoid leaving behind lint or debris on the disc’s surface.
- Be patient and thorough in your cleaning, as multiple passes may be necessary for heavily smudged discs.
White vinegar is an effective and safe option for cleaning optical discs when used in the correct proportions. It can help remove smudges, fingerprints, and minor surface contaminants, improving the readability of the disc. However, for severely scratched or damaged discs, professional disc repair services may be required.
Clean Discs With a Disc Repair Machine
For severely scratched or damaged discs, disc repair machines can be used. These devices buff and resurface the disc’s protective layer. They are typically available at specialty stores or can be rented. A disc repair machine is a specialized device designed to restore and repair the surface of optical discs like CDs, DVDs, and Blu-rays. These machines are commonly used to address more severe issues, such as deep scratches and damage that cleaning kits or DIY methods may not effectively repair. Here’s more information about using a disc repair machine:
Components of a Disc Repair Machine:
- Disc Repair Unit: The core component of a disc repair machine is the repair unit itself. This unit typically includes a disc holding mechanism, a buffing or resurfacing wheel, and a motor to power the process.
- Buffing or Resurfacing Wheel: The buffing or resurfacing wheel is the component responsible for gently removing a thin layer of the disc’s protective coating. This process can help eliminate minor scratches and other surface imperfections.
- Cleaning Solution: Disc repair machines use a specialized cleaning or polishing solution to enhance the repair process. The solution can vary depending on the machine’s design.
How to Use a Disc Repair Machine:
The exact process for using a disc repair machine may differ depending on the specific model and manufacturer. However, the general steps involved are as follows:
- Prepare the Disc: Place the optical disc you want to repair into the machine’s disc holding mechanism. Ensure the disc is securely held in place.
- Apply the Cleaning Solution: Most machines require the application of a cleaning or polishing solution to the disc’s surface. Follow the machine’s instructions to apply the solution.
- Start the Repair Process: Turn on the disc repair machine. The buffing or resurfacing wheel will gently remove a thin layer from the disc’s surface. This process aims to eliminate minor scratches and imperfections.
- Monitoring and Timing: Many machines have a timer to control the duration of the repair process. The machine will automatically stop when the allotted time is reached.
- Eject and Inspect: Once the repair process is complete, the machine will typically eject the disc. Carefully remove the disc and inspect it for any remaining issues. It’s essential to handle the disc by the edges to prevent smudges and fingerprints.
- Test the Disc: Place the repaired disc into a compatible player or drive to test its readability and performance. Note that not all discs can be fully restored, especially if the damage is severe or if the data layer has been compromised.
Tips for Using a Disc Repair Machine:
- Read and follow the manufacturer’s instructions for the specific disc repair machine you are using.
- Be patient and thorough when inspecting the disc after repair, as the effectiveness of the process can vary based on the disc’s condition and the machine’s capabilities.
- Disc repair machines are typically more effective for addressing minor scratches and surface imperfections rather than severe damage.
- If you have valuable or irreplaceable discs, it’s advisable to seek professional disc repair services for the best results.
Using a disc repair machine can be a practical solution for restoring optical discs with minor surface imperfections. However, for severely scratched or damaged discs, professional disc repair services are often the most effective option for achieving the best results.
Cleaning Discs With The Eraser Method
Some people use a soft, clean eraser (pencil eraser) to carefully rub the disc’s surface in straight lines. This can help remove minor scratches and smudges. Be very gentle and use a clean cloth to wipe away any eraser residue. Using a soft, clean eraser to remove minor scratches and smudges from a CD, DVD, or Blu-ray is a common DIY method for disc cleaning. Here’s a detailed guide on using this technique:
Materials You’ll Need:
- Soft, clean eraser (pencil eraser)
- Clean, lint-free cloth
- Optical disc with minor scratches or smudges
Steps to Use an Eraser to Clean a Disc:
- Inspect the Disc: Examine the CD, DVD, or Blu-ray for visible smudges, fingerprints, or minor scratches. Hold it by the edges to avoid touching the playing surface.
- Blow Away Loose Dust: Use a can of compressed air or gently blow across the disc’s surface to remove any loose dust particles. This step helps prevent additional scratches during cleaning.
- Prepare the Eraser: Ensure that the eraser you intend to use is clean and free of any pencil graphite or debris. If it’s not clean, you can gently rub it on a piece of scrap paper to remove any residue.
- Apply Gentle Pressure: With a firm but gentle grip, use the clean eraser to rub the disc’s surface. Move in straight lines from the center of the disc to the outer edge. Do not use circular motions, as they can potentially cause more scratches.
- Inspect Progress: After a few strokes, examine the disc to see if there is any improvement in the scratches or smudges. Be patient and avoid applying excessive pressure.
- Repeat as Needed: If the scratches or smudges are persistent, continue gently rubbing with the eraser. Be cautious not to overdo it, as excessive pressure can lead to further damage.
- Clean Off Residue: After you’re satisfied with the cleaning, use a clean, lint-free cloth to wipe away any eraser residue or debris from the disc’s surface.
- Test the Disc: Before attempting to play the disc, test it in a device to ensure it still functions properly. In most cases, using an eraser should improve the disc’s readability, but severe or deep scratches may not be fully resolved by this method.
Tips for Using an Eraser:
- Use a clean eraser to avoid transferring pencil graphite or other contaminants to the disc’s surface.
- Avoid using abrasive or gritty erasers, as they can cause additional damage.
- Always handle the disc by the edges to prevent fingerprints and smudges.
- Be patient and gentle during the eraser cleaning process, and avoid excessive pressure.
- If the disc is valuable or has critical data, consider seeking professional disc repair services for severe or deep scratches.
Using an eraser can be an effective DIY method for minor scratch and smudge removal on optical discs. However, it may not fully restore severely damaged discs, and for valuable or irreplaceable discs, professional disc repair services are recommended.
Can You Really Remove Scratches?
Yes, it is possible to remove or significantly reduce scratches on optical discs such as CDs, DVDs, and Blu-rays, but the success of the process depends on several factors, including the severity of the scratches, the type of disc, and the methods used. Here are some key points to consider:
- Minor Scratches: For discs with minor and shallow scratches, it is often possible to improve or even fully repair them. These scratches may only affect the disc’s protective layer, not the data layer underneath.
- Deep Scratches: If the scratches are deep and have reached the data layer of the disc, the chances of a complete repair are reduced. In such cases, the focus is on improving readability rather than achieving a flawless surface.
- Methods: Various methods and products can be used to address scratches, including commercial disc cleaning kits, polishing compounds, and disc repair machines. The effectiveness of these methods depends on the severity of the scratches and the quality of the equipment or products used.
- Professional Repair: For valuable or irreplaceable discs, it is often best to seek professional disc repair services. These services have specialized equipment and expertise to handle a wide range of disc damage, including deep scratches.
- Testing: After attempting any repair method, it’s essential to test the repaired disc in a player or drive to determine if it plays without errors. Some scratches may be reduced but not completely eliminated, which may still affect the disc’s performance.
- Prevention: To avoid scratches in the first place, proper disc handling and storage are crucial. Always handle discs by the edges to prevent smudges and scratches, and store them in protective cases when not in use.
In summary, while it is possible to improve or repair scratches on optical discs, the success of the process depends on the specific circumstances and the methods used. For valuable or important discs, seeking professional disc repair services is often the best approach to achieve the most effective results.
What’s The Best Way?
Removing scratches from optical discs like CDs, DVDs, and Blu-rays can be challenging, and the best method depends on the severity of the scratches. Here are some methods you can try, starting with the least aggressive:
- Microfiber Cloth and Water:
- Start with a clean, microfiber cloth.
- Dampen it with water.
- Gently wipe the scratched area from the center of the disc toward the outer edge in straight lines.
- Dry the disc with a different clean, dry microfiber cloth.
- Toothpaste:
- Use a non-gel, non-abrasive toothpaste.
- Apply a small amount to the scratched area.
- Gently rub with a clean, damp microfiber cloth in straight lines from the center to the edge.
- Rinse with water and pat dry.
- Commercial Scratch Removers:
- There are commercial disc scratch remover products available. Follow the instructions provided with the product carefully.
- Baking Soda Paste:
- Mix baking soda and water to create a paste.
- Apply the paste to the scratch and rub gently with a cloth.
- Rinse and dry the disc.
- Professional Disc Repair Services:
- If the scratches are severe or these DIY methods don’t work, consider professional disc repair services. They have specialized equipment and expertise for disc repair.
- Retrieving Data: If the scratched disc contains important data and the scratches are impeding its use, consider seeking data recovery services to retrieve the content from the disc.
It’s important to note that while these methods can improve the readability of a scratched disc, they may not completely remove deep scratches. The success of these methods depends on the severity of the scratches and the specific circumstances. Always handle discs by the edges to prevent further damage, and store them in protective cases to avoid future scratches.
Tips To Help Keep Your Discs Clean
Keeping your CDs and DVDs clean and preventing dirt build-up and scratching is essential for maintaining their longevity and readability. Here are some tips to help you achieve this:
- Handle Discs Carefully: Always handle discs by the edges to prevent smudges, fingerprints, and scratches on the playing surface. Avoid touching the bottom (data side) of the disc.
- Store in Protective Cases: When not in use, store your discs in protective cases or sleeves. These cases shield them from dust, dirt, and potential physical damage. Keep the cases clean as well.
- Avoid Direct Sunlight: Do not expose discs to direct sunlight or extreme heat, as this can cause warping and damage to the disc’s protective layer.
- Store Vertically: Store discs vertically (on their edge) rather than horizontally (stacked). Stacking discs can lead to scratching and damage.
- Clean Discs When Necessary: Regularly inspect your discs for smudges, dirt, or contaminants. Clean them with a soft, lint-free cloth or a microfiber cloth when necessary. Use gentle, straight-line wiping motions from the center to the edge.
- Use a Soft Brush: If there is loose dust or dirt on the disc’s surface, you can use a soft brush or a can of compressed air to remove it before cleaning with a cloth.
- Avoid Abrasive Materials: Do not use abrasive materials like paper towels or tissue paper to clean discs, as they can scratch the surface. Stick to soft, non-abrasive cleaning materials.
- Keep the Area Clean: Maintain a clean and dust-free environment where you handle and store your discs. Clean the area regularly to prevent contaminants from settling on the discs.
- Labeling: If you need to label your discs, use a soft-tip, water-based marker designed for CD/DVD labeling. Avoid using adhesive labels, as they can damage the disc’s surface over time.
- Regularly Clean Optical Drives: If you frequently use the same optical drive, clean the drive’s lens periodically. Dust or dirt on the drive’s lens can transfer to the discs, potentially causing issues.
- Keep Discs Dry: Moisture can damage the disc’s protective layer. Avoid exposing discs to excessive humidity or moisture, and store them in a cool, dry place.
- Data Backups: Make backups of valuable or irreplaceable discs. This ensures that even if a disc becomes unreadable, you have a copy of the data.
By following these tips, you can help prevent dirt build-up and scratching, ensuring that your CDs and DVDs remain in good condition and perform optimally for an extended period.
Remember to always handle discs by the edges to prevent fingerprints and smudges. Additionally, avoid excessive pressure or circular motions when cleaning, as these actions can lead to more scratches. After cleaning, allow the disc to air dry or use a clean, dry cloth to pat it dry gently.
If a disc is valuable or has critical data, consider seeking professional disc repair services, especially for deep scratches or severe damage. Proper care and cleaning can help prolong the life of your optical discs and maintain their playback quality.
Got a better way to clean? If you know of a safe and effective way to get this job done, please share your method in the comments section below.
Tried this method? If you’ve cleaned your discs using this method, or one of your cloths, we would love to hear how it went. Leave your feedback in the comments below.
2 Comments To "Easily Clean your CD’s, DVD’s, and BLU-RAY Discs"
#1 Comment By John On 02/18/2007 @ 9:52 AM
If these clothes are so gentle on surfaces how on earth do they remove fine scratches from cds?have they got some sort of chemical in them?
#2 Comment By SimplyGoodStuff On 02/19/2007 @ 4:29 PM
Each “microfiber” is 100 times thinner than human hair. These fibers are then woven into dense masses of tens of thousands of threads per square inch. The fibers themselves have wedge shaped tips that skim the surface and lift up dirt. They are also extremely absorbent, so they lock in the dirt and hold it. Warm water facilitates the cleaning process because it expands the fibers.
It is an incredibly efficient cloth so chemicals and cleaners are not necessary. They are not treated with any chemicals and you don’t need any to clean with them either. There is no risk of damage when you use these cloths.