Want to make some delicious cupcakes that look like they came from a high end bakery? Sure you do. It’s a quick and easy way to prepare an eye-catching treat for birthdays, weddings and other parties, and you’re pretty much guaranteed to impress friends and family when you produce something that is both professional looking, and mouth watering. Simple tools can mean the difference between the perfect finished product, and failing miserably, so be sure you have the right supplies if you want to decrease frustration, and improve your outcome when adding filling to homemade cupcakes.
One of the best tricks that pros use to elevate the cupcakes they bake, is to remove the middle of the cake in order to make room for frosting, pudding, candy or something else yummy or surprising. You could attempt this with a knife or a spoon, but you’ll never get a uniform size, and you are very likely to deal with annoying stuff like cupcakes that collapse and crumble, or sections of cake that don’t remove all the way. With the right knife, and the right technique, you can certainly get the job done, but you can also save time, effort and energy with the addition of a small affordable tool.
Using a cupcake corer will make this job fast and simple, but it will also ensure that every hole you cut is the same, perfect size.
How To Fill a Cupcake Using a Knife
The addition of filling can take your cupcakes to the next level by adding a delicious surprise in the center. If you’re careful enough, and use the right knife, you can cut out the center in order to fill it with something else. Although it’s pretty easy to do, you’ll get better with practice, and perfecting the technique will take some time. The most difficult part will be achieving uniform size, and completing the job without taking a long time. To get good results when cutting the core from your homemade cupcakes, follow the tips and instructions below:
Ingredients and Tools:
- Cupcakes
- Filling (e.g., fruit preserves, chocolate ganache, cream cheese frosting, lemon curd, Nutella, peanut butter, caramel)
- Piping bag or zip-top bag
- Piping tip (optional)
- Knife
- Pastry tip (optional)
Instructions:
- Bake the Cupcakes:
- Start by baking your cupcakes according to your favorite cupcake recipe. Allow them to cool completely before adding the filling.
- Prepare the Filling:
- Choose your desired filling. Fillings can vary widely, from fruit preserves to creamy fillings like chocolate ganache or frosting. Make sure your filling is at room temperature or slightly warmed for easy piping.
- Core the Cupcakes:
- To make room for the filling, you’ll need to remove a portion from the center of each cupcake. You can do this with a sharp knife.
- Make sure to use a knife that is small enough, and also sharp enough. Gently cut a cone-shaped piece from the top of the cupcake and set it aside.
- Fill the Cupcakes:
- Place the prepared filling into a piping bag or a zip-top bag. If using a piping bag, you can attach a pastry tip for more precise filling, but it’s not necessary.
- Pipe the filling into the cavity you created in each cupcake. Be careful not to overfill; you want the filling to be just below the level of the cupcake’s top.
- Replace the Tops:
- Use your knife to trim the pointed end of the cake piece you removed to create a flat top. Place this trimmed piece back on top of the filled cavity to cover the filling.
- Frost the Cupcakes (Optional):
- If desired, you can now frost the cupcakes with your favorite frosting. This helps to seal the filling inside and adds another layer of flavor.
- Decorate as Desired:
- Once your cupcakes are filled and frosted (if desired), you can decorate them with additional frosting, sprinkles, or other toppings to your liking.
- Chill (if needed):
- Depending on the type of filling you used, you may need to refrigerate the cupcakes briefly to set the filling. Creamy fillings, like cream cheese or ganache, may need some time to firm up.
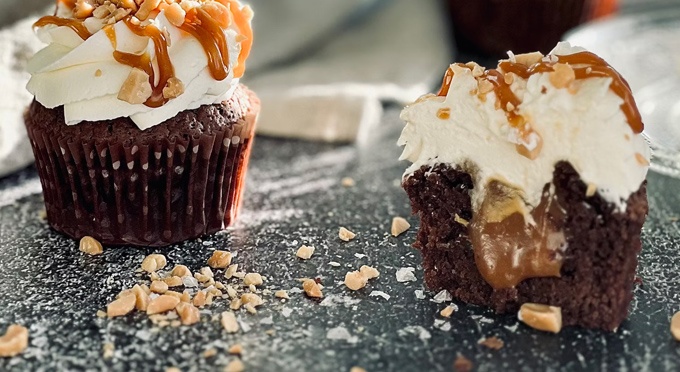
Adding a filling to cupcakes adds a fun and tasty element to your baked treats, making them perfect for special occasions or just as a delightful treat for yourself and others. You can add something tasty, or you can add something colorful and surprising. When anyone takes a bite, they’ll be pleasantly surprised and thoroughly impressed.
An Easy Way To Remove The Center of a Cupcake
 If you want to remove the middle portion of a cupcake in order to add a filling to the center, it can be way easier to use a specialized tool instead of a regular knife. When you do you’ll speed up the job and guarantee results at the same time. Each cupcake will have the same amount removed from the center, and each hole will be the same exact size. Thanks to the quick and deliberate action, you’ll also run a lower risk of damage when compared to cutting out the core with a knife.
This tool is incredibly simple, but also very useful and effective. As mentioned, you could certainly use things you already have, but the results won’t be as good, or easy to come by. You could also pay more, and get a cupcake corer that is unnecessarily fancy, or one that is equally simple, but just more costly. The affordable tool we carry will get the job done without breaking the bank, but you won’t compromise quality, or make the job any more difficult. It is easy-to-use, and easy to clean afterward. A simple action of press, twist, and lift will remove the perfect amount of cake, so your cupcake won’t cave in, crumble or squish as you’re trying to fill it.
Our Cupcake Corer [1] is actually a two piece set. It comes with one standard size cutter, and one smaller one that is perfect for mini’s. Both are very similar, but one is just a bit skinnier and shorter. They are essentially plastic cylinders with a tapered edge at the bottom, and a fat, flower-shaped handle at the top. The slightly sharp edge at the bottom allows it to slide in easily, and the large handle allows you to lift up without any trouble.
They’re both sized to take out the perfect amount from the center of your cupcakes, and prevent any frustration caused by uneven cuts, holes that are too deep, or cores that don’t come out in one piece. The material is 100% BPA-free and dishwasher safe, so you don’t have to worry about dangerous chemicals, or the time it takes to hand wash.
How To Fill a Cupcake Using a Cupcake Corer
Way easier than using a knife or anything else, a cupcake core remover tool will allow you to take out the middle of any homemade cupcake in a matter of seconds. Once you take it out, you can have a little snack, but you can also fill the homemade pastry you’re making with something extra yummy.
Squeeze in extra icing before frosting the top, or add pudding, jelly, peanut butter, custard or ice cream for something truly special. It works well for virtually any size of cupcake, but you could also use it for muffins as well. Anyone can use this tool to improve the taste and presentation of their creations, but follow the steps below for best results.
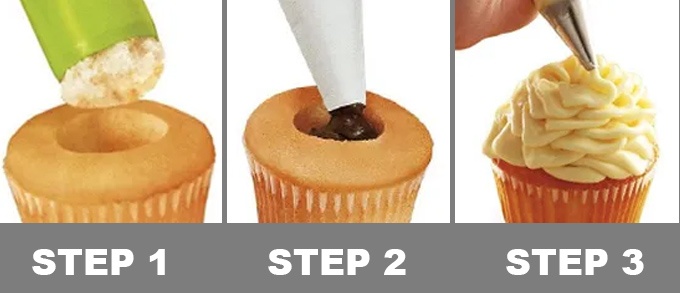
- Step one is to decide which size you want to use. The green cupcake coring tool is a standard size, so it works for regular cupcakes or ones that are slightly bigger. For smaller cupcakes, choose the pink tool because it will cut a smaller hole.
- To use the cupcake corer, simply align it over your cake so that it is right in the middle. Once it’s lined up, simply press down and cut to the desired depth.
- You can cut using the full length of the tool, or you can cut out less. A slight twisting action will ensure a clean cut, and also make sure that the center of the cupcake pops out easily, and in one piece.
- To take out the section of cake you that you cut, simply lift straight up. It will remain inside the tool, so nothing is left behind. Press at the center with your finger to pop it out and proceed to the next cupcake.
- Once the center is gone, fill the cavity with frosting, jam, ice cream, pudding or custard up to the top.
- To finish the job, spread regular frosting over the top to conceal your filling, and then decorate as desired. You can even cover the hole with a small piece of cake first.
- For any fillings that require chilling, make sure to store in the fridge or freezer as needed.
- Hand wash or place in the dishwasher when dirty.
Don’t spend a bunch of money to have someone else do it for you. And don’t waste energy, or get frustrated just to save a few bucks. A cupcake corer is a simple but remarkable tool that will transform this job from something impossible, into something super easy. Instead of wasting the whole batch as you shred and mutilate your cupcakes, you’ll be able to do one after another in a matter of seconds.
Save money, impress guests, or just give yourself a new toy to play with. The easiest way to look like a pro is to use the same tools. Professional bakers would never use a knife to core a cupcake because a specialized tool ensures uniform results while eliminating most of the risks. Save your knives for self defense and cutting steaks. A cupcake corer is the fast and easy way to cut out the center of homemade cupcakes to add a delicious filling.
Products Mentioned
- Cupcake Corer [1]