Composting is a natural process that transforms organic material into nutrient-rich soil, often referred to as “black gold” for gardeners. By breaking down kitchen scraps, yard waste, and other organic matter, composting not only reduces waste but also enriches the earth with valuable nutrients for plant growth. In this in-depth article, we will explore the art and science of composting, from the basics to advanced techniques, with plenty of practical examples and details to help you get started.
The Composting Basics
Composting is essentially the decomposition of organic materials into humus, which is a stable organic matter rich in nutrients. The key ingredients for successful composting include greens, browns, air, and water.
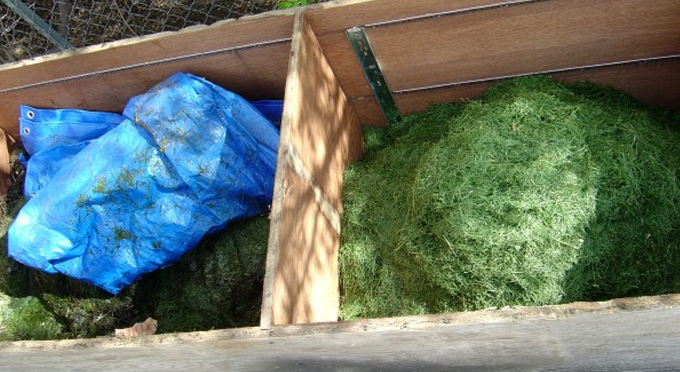
Greens: Green materials, like kitchen scraps (vegetable peels, coffee grounds, etc.) and fresh yard waste (grass clippings), provide nitrogen. These materials are rich in protein, which is crucial for the growth of microorganisms responsible for breaking down the compost.
Browns: Brown materials, such as dried leaves, straw, and cardboard, supply carbon. They act as an energy source for microorganisms and help create the right carbon-to-nitrogen ratio in the compost pile.
Air: Oxygen is essential for the aerobic decomposition of compost. Turning the pile regularly, ensuring proper aeration, and avoiding compaction will promote the growth of beneficial microorganisms.
Water: Maintaining the right moisture level is crucial. Compost should feel like a damp sponge. Too little water slows decomposition, while too much water leads to anaerobic conditions and unpleasant odors.
Composting in Practice
To start composting, designate a dedicated area in your yard or use a container system. Here’s a step-by-step guide:
- Choosing a Location: Select a well-drained, level area that receives partial sun. It should be convenient to access from your kitchen or garden.
- Compost Bin or Pile: You can use a compost bin or create a simple pile. Enclosed bins help control pests and temperature, but open piles are more accessible.
- Layering: Begin with a layer of browns (e.g., dried leaves) followed by a layer of greens (kitchen scraps). Continue alternating layers, ensuring a balanced mix of carbon and nitrogen.
- Moisture Management: Keep the compost moist but not soggy. Water when needed, especially during dry periods.
- Turning the Pile: Aerating the compost speeds up decomposition. Use a pitchfork or compost turner to mix the materials, and turn the pile every few weeks.
- Achieving Balance: Maintain the right carbon-to-nitrogen balance by adjusting the ratio of greens and browns. Greens should be about 1/3 of the mix.
Advanced Composting Techniques
Once you’re comfortable with the basics, you can explore more advanced composting techniques.
Vermicomposting: Using worms, such as red wigglers, in a dedicated bin to process kitchen scraps is a highly efficient method. Worm castings (vermicompost) are rich in nutrients and beneficial microorganisms.
Hot Composting: Hot composting involves maintaining specific temperatures (around 130-160°F or 54-71°C) within the pile. This method produces compost more quickly but requires careful monitoring.
Bokashi Composting: This anaerobic method uses a special bucket and effective microorganisms (EM) to ferment kitchen waste. Bokashi composting can handle a broader range of materials and is ideal for urban dwellers.
Composting Troubleshooting
Composting can encounter challenges, but most issues are easily resolved:
- Smell: A foul odor usually indicates poor aeration or too much moisture. Turn the pile, add browns, and ensure proper aeration.
- Pests: To deter pests, avoid adding meat, dairy, or oily foods to the pile. Use a secure compost bin, or bury these materials deep within the pile.
- Slow Decomposition: If your compost isn’t breaking down as expected, it may be too dry, not aerated enough, or lack sufficient greens for the microorganisms to feed on.
How Long Does It Take To Make Compost?
The time it takes to make compost varies depending on various factors, including the composting method, the materials used, and environmental conditions. In general, compost can take anywhere from a few months to several years to fully mature. Here’s a breakdown of the typical composting timeframes:
- Fast or Hot Composting: This method involves carefully managing the compost pile’s carbon-to-nitrogen ratio, aeration, and moisture to create high temperatures (around 130-160°F or 54-71°C). Under ideal conditions, hot composting can produce finished compost in as little as a few weeks to a few months.
- Traditional or Cold Composting: In a more passive composting process, where the pile is not as carefully managed, it can take six months to two years or more to create finished compost. This method relies on natural decomposition processes, so it takes longer.
- Vermicomposting: With the help of composting worms (such as red wigglers), vermicomposting is highly efficient. It can yield finished compost in two to six months, depending on the size of the worm bin, the type of materials added, and the number of worms present.
- Bokashi Composting: Bokashi composting, an anaerobic method using effective microorganisms, can ferment kitchen waste quickly. It typically takes two to four weeks for the waste to ferment before it can be added to a compost pile for final decomposition, which can take several months.
- Climate and Season: Composting may be slower during cold winter months, especially in areas with freezing temperatures. Warmer weather speeds up the decomposition process.
- Size and Turnover: Smaller compost piles or bins tend to decompose materials more slowly than larger ones. Turning or aerating the pile regularly accelerates decomposition.
- Proper Layering and Ratios: The correct balance of green (nitrogen-rich) and brown (carbon-rich) materials, along with good layering and moisture management, can significantly affect the composting speed.
It’s important to note that compost doesn’t have to be fully mature to be beneficial. Even if your compost is not completely broken down, you can use it as a soil conditioner or mulch in your garden. Over time, the remaining compost will continue to decompose and enrich the soil. Ultimately, the time it takes to make compost depends on your goals, methods, and the effort you put into managing the composting process.
Harvesting Compost
Compost is ready for use when it looks and smells like dark, crumbly soil. This typically takes about six months to two years, depending on your composting method and conditions. To harvest, simply shovel or fork out the mature compost from the bottom of the pile.
What About Location or Store-Bought Bins?
The best location for making compost and whether to buy a bin or make your own depends on your specific circumstances and preferences. Here are some considerations to help you decide:
Location:
- Convenience: Choose a location that’s easily accessible from your kitchen and garden. The closer it is to these areas, the more likely you are to use it consistently.
- Sunlight: While full sun is not necessary, a partially sunny spot is ideal, as it can help heat up the compost pile, promoting decomposition.
- Drainage: Ensure the chosen spot has good drainage to prevent waterlogging.
Compost Bin vs. Homemade Pile:
Compost Bin:
- Pros:
- Containment: Bins contain the compost pile, making it neater and deterring pests like rodents.
- Aeration: Many bins have mechanisms for easy aeration, promoting decomposition.
- Temperature Control: Enclosed bins can help regulate temperature, useful for hot composting.
- Aesthetic: They can look neater and more organized in your yard.
- Cons:
- Cost: Purchasing a compost bin can be an initial expense.
- Size Limitations: Bins have a set capacity, limiting the amount of compost you can produce at once.
- Assembly: Some bins require assembly.
Homemade Pile:
- Pros:
- Cost-Effective: You can create a compost pile for little to no cost using materials you already have.
- Scalability: You can easily expand the pile’s size as needed.
- Simplicity: No need to assemble or maintain a bin.
- Cons:
- Aesthetics: Piles may appear less tidy and can be more attractive to pests.
- Potential for Unwanted Growth: Weeds and volunteer plants can sometimes grow in open piles.
- Aeration: You’ll need to turn the pile manually for aeration.
Choosing Between Bin and Pile:
- Urban Environments: If you live in an urban area or have limited space, a bin may be a better choice to contain the compost and maintain a tidy appearance.
- Space and Volume: If you have ample space and generate a significant amount of organic waste, a homemade pile might be more practical.
- Cost and Aesthetics: Consider your budget and how important the appearance of your composting setup is to you.
- Time and Effort: Homemade piles require manual turning, so consider whether you have the time and inclination for this.
Ultimately, both bins and homemade piles can be effective for composting. The choice comes down to your specific needs and preferences. Whichever method you choose, following composting best practices, such as maintaining the right carbon-to-nitrogen ratio, proper layering, and regular turning, will help you create high-quality compost for your garden.
Using Compost
Compost is a gardener’s best friend. You can use it to:
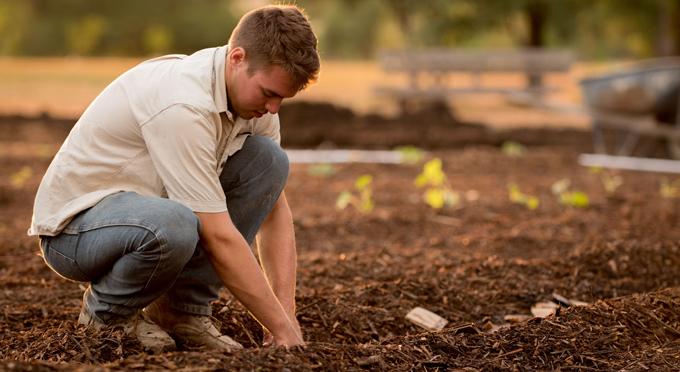
- Improve Soil: Mix compost into garden beds to enhance soil structure and nutrient content.
- Mulch: Spread compost as a protective mulch around plants to conserve moisture and suppress weeds.
- Seed Starting Mix: Create a homemade seed-starting mix by blending compost with other materials.
- Container Gardening: Use compost as part of the potting mix for containers and indoor plants.
- Lawn Care: Top-dress your lawn with a thin layer of compost to enrich the soil and encourage healthy grass growth.
Composting is a sustainable practice that turns kitchen waste and yard debris into a valuable resource for your garden. By following these basic principles and experimenting with advanced techniques, you can create nutrient-rich compost that benefits your plants and reduces the environmental impact of organic waste. Embrace the art and science of composting, and you’ll find yourself well on your way to turning kitchen scraps into “black gold” for your garden.


 Ordering Info
 Customer Service
 Follow Us
 Search For Stuff
 Find Us
 Call Us
 Pay Us
0 Comments so far.
Use the form below to add your own thoughts or questions. Scroll down to read what other people had to say.