Want a healthy garden full of large plants? Want to avoid chemical fertilizers in the process? One of the best ways to feed your garden and keep your plants healthy is to add fresh, homemade compost. It can be tough to do it the right way, but when you do, you’ll save money and improve your results.
What Is Compost
Comprised of decayed organic material, the dark, nutrient-rich substance resembles mulch, and is used as a fertilizer for plants, or conditioner for soil. Compost can be sprinkled on top, or mixed in to improve soil quality, and promote plant growth. In order to make it, you need to pile green waste, mix it with equal parts of brown waste, and then keep it warm and moist.
Regular turning will aerate the mixture to promote even decomposition. When environmental conditions are ideal, microorganisms will consume the organic matter and make it decompose. Worms and fungi will aid in this process. Stuff will degrade naturally anyway, but the composting process speeds it up, and improves the end result.
Why It’s Good
There are many benefits to composting that go way beyond feeding plants, or throwing less stuff in the trash. Both those things are great, but the long list of other benefits below, only add to the appeal.
- Compost is a biologically active soil amendment, and the bacteria, insects and fungi contained in it will make plants healthy in a natural way.
- When added to the dirt in your yard, homemade compost will improve the soil structure. Sandy soil will be able to retain more moisture, and soil that is dense with clay will be easier to work with, and more conducive to root growth.
- When you use it, the pH level of your soil will balance. It doesn’t matter if it is acidic or alkaline because the compost will neutralize it, and make the perfect amount of nutrients available to your plants.
- Not only is compost more complete as a fertilizer, it is also slow to release the nutrients, so it lasts longer too.
- Because it’s so delicious, compost attracts earthworms and microorganisms to further enhance the surrounding soil.
- It can help to prevent and control erosion.
- When you make your own compost, it reduces waste in your trashcan and landfills.
- Making your own fertilizer saves you money and the trip to the store to buy commercial products.
- Using compost instead of other options reduces your exposure to harsh chemicals found in of the shelf brands.
- Gardening with compost reduces weed growth, and insulates during cold weather when used as mulch.
- It saves on watering because it will hold more moisture, and promote healthier root growth.
What To Put In Your Compost
There’s a wide range of ingredients you can use, but certain things should be avoided. You basically want an equal mix of green and brown organic matter. The green stuff is going to be wet and full of nitrogen, and the brown stuff will be dry and full of carbon. When combined under ideal conditions, the two will create a balanced mix that decomposes evenly, and creates a high quality mixture often referred to as black gold.
Greens – Commonly used green stuff will include: Fruit skins, vegetable peels, coffee grounds, coffee filters, tea bags, egg shells, garden scraps, plant trimmings, table scraps and leftovers.
Browns – Commonly used brown stuff includes: Dry leaves, grass clippings, straw, sawdust, shredded newspaper, shredded cardboard, and shredded egg cartons.
DO NOT Put In – Avoid adding stuff like those in the following list: Meat and fish, dairy products, sauces and dressings, oil and fat, pet waste, diseased plants, seeding weeds, bones, and cigarette butts.
Basic Instructions
Below we will detail the basic process of composting in your yard. Anyone can use the following directions along with a few basic tools to make their own fertilizer and soil amendment. If you want to ease the process, and speed up results, continue reading to learn about how to use our Deluxe Tumbling Composter.
- Choose a location. Building a box or bin can help keep things neat, but you can also just pile it up.
- When adding materials, make sure they’re not too big. Reduce size to about an inch for fast and even decomposition.
- Add your ingredients to create the pile. Choose equal parts green and brown matter for an ideal level of nitrogen and carbon.
- Moisture and heat are required for it to work. It will insulate itself to create heat, and moisture should be at a damp level, and not too wet. A hot pile will degrade quickly, but a cool one will take twice the amount of time in some cases.
- Aeration is also necessary to aid in the process. Mix your compost a few times each week so air can get to all ingredients.
- After several months your mixture should be ready to use. The smell should not be rotten are stinky. It should smell rich and earthy.
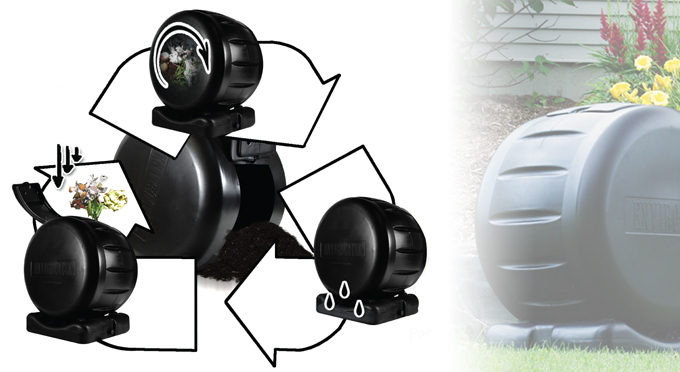
Using The Deluxe Tumbling Composter
An advanced tool can speed up results, improve nutrient levels, and make it way easier and less stinky to compost in your yard. The spinning action will allow you to keep your pitchfork in the garage, and reduce effort to almost nothing.
A few rotations a week is all that’s required to maintain it, and everything will be ready to use in way less time than any traditional method. Because it’s totally enclosed, odor will be reduced to make it more pleasant, and heat will increase to speed up the process.
An added benefit of this deluxe version is the collection of liquid fertilizer under the rotating bin. You will be able to produce 52 gallons of dry compost, and a bonus, 3.5 gallons of liquid fertilizer at the same time. To use it, just follow the easy steps below.
Step 1: Getting Started
- Use a container inside to collect waste in your kitchen. Remember, smaller pieces will break down faster.
- Combine indoor waste, with brown waste collected from your garden and elsewhere.
- A 50/50 mix will always be best. Once collected, open the latching door, and add to the inside of the drum.
- As an option, add a small amount of good soil to activate your first batch.
- Once loaded, close the lid and then secure the latch to keep it shut.
- Add more ingredients over time as they are collected.
- Once shut and filled, rotate the bin to mix the stuff inside.
- Eight rollers underneath and large grooves around the outside make spinning it easy.
Step 2: During The Cycle
- To ensure air circulation and a good mix, make sure to rotate the bin at least three times each week.
- As the drum fills to capacity, it may become too heavy for some people to rotate. In this case, a rocking motion will work just fine.
- For best results, don’t fill the container more than 3/4 full.
- Keep the stuff inside wet, but not too wet. A low level of dampness is ideal, but if there’s too much water, it may begin to stink. If this should occur, just add more brown material to soak it up.
- The finished product will take 4-6 weeks to produce. If you want to speed things up, just rotate the drum more often.
Step 3: Using Your Finished Product
- To use your compost, separate the drum from the base, and roll it close to the spot where you want to use it.
- Unlatch the door, and open it up, then roll the bin forward to make it easy to take the contents out.
- As an option, leave a small amount inside to activate your next batch.
- For use on indoor plants, let the compost air out in a bin, or on your lawn to reduce moisture. This will take 1-2 days.
- Make a potting mix by mixing one part compost along with equal amounts of peat moss, sand and ground bark.
- Mix it into flower beds and vegetable gardens to improve the soil and feed the plants. If it;s the first time, mix in a 3-4 inch layer. If it is a repeat application, use as little as one inch.
- Use like a mulch by spreading in and around flowers in a 1-4 inch layer.
- Surround trees and shrubs in a thick layer to feed roots, and retain moisture.
- Feed your lawn by sprinkling a thin layer all over.
Step 4: Using Your Compost Tea
- With the drum removed, the liquid collected in the base will be easy to access.
- When new, there will be four plugs installed. Two in the composter, and two in the base. To collect the tea, place all four into the center holes in the base.
- Be sure to keep the holes at the ends open and free of blockage.
- To empty the base, attach a garden hose to the threaded opening, or just dump everything into a bucket.
- To use it as fertilizer, mix one part compost tea with ten parts water.
- This highly concentrated liquid is an extremely potent food for all plants.
Make Compost 12 Months A year
Unlike other techniques and solutions, this one can be used all year long. As long as it gets cold enough in your area to freeze, you can easily compost in the winter. To make access easy, you should relocate the bin to a spot close to your home. Continue to add waste throughout the cold months, but don’t spin it at all. The freezing process will break down the fibers in organic material, and will accelerate decomposition in the spring.
Why use This Tumbler Over Other Options
Traditional techniques are slow, and they require manual labor that some want to avoid. Also, you only get a dry mulch with regular bins and piles, so you lose out on the liquid fertilizer referred to as tea. Other tumbling options are often made with cheaper materials, smaller capacities, and drums that are difficult to spin. Some may be as large and easy to use, but they won’t collect liquid or last as long in most cases.
If you’re looking for a top of the line model that will make the process fool-proof, then look no further. This one could not be more easy to use, and the results are amazing. Your yard will look better than ever, and you will be able to do it without expensive purchases, dangerous chemicals, or loads of extra effort.


 Ordering Info
 Customer Service
 Follow Us
 Search For Stuff
 Find Us
 Call Us
 Pay Us
0 Comments so far.
Use the form below to add your own thoughts or questions. Scroll down to read what other people had to say.