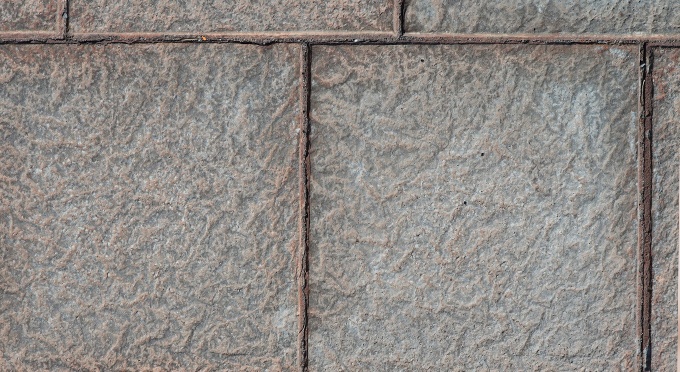
Those little lines do more than just collect dirt. They also seal and fill joints between flooring and wall tiles in order to create a solid surface, and secure the pieces in place. Grout is sort of like cement, and it comes in many different colors. It will go on like a thick liquid, and then set over time to end up completely hard. Once dry, grout becomes a permanent fixture in your bathroom or kitchen, and depending upon style and tile type, the lines can be thick or thin.
The area between each tile will be completely filled with grout, and it’s always lower, so it’s ideal for collecting grime, and also making it impossible to remove. In order to keep your tiled surface looking it’s best, you will probably have to resort to specialized tools or techniques because it can be pretty difficult to get good results with a simple spray and wipe system. A gleaming surface is much nicer to look at, but it’s also way safer. Use the tips and techniques below to improve appearance and create a healthier environment at the same time. When you use the methods below, it will be easy to clean your tile grout and remove any stains.
What Is Grout And Why Is It There?
Trust that it’s not just there to annoy you, and it does serve an actual purpose. Grout is a material used in construction and home improvement projects to fill gaps or spaces between tiles or masonry units. It serves both functional and aesthetic purposes in various applications, including tiling floors, walls, and backsplashes. Here are some key details about grout:
Composition: Grout is typically composed of a mixture of cement, water, and often sand. Depending on the specific application and requirements, different types of grout formulations may be used. These can include:
- Cementitious Grout: Made from a mixture of Portland cement, water, and aggregates (usually sand). It’s the most common type of grout used.
- Epoxy Grout: Consists of epoxy resins, a hardener, and fillers. Epoxy grout is highly resistant to stains, chemicals, and moisture, making it suitable for areas prone to high humidity or heavy use.
- Urethane Grout: Formulated with urethane resins, fillers, and pigments. It’s known for its flexibility, durability, and resistance to moisture and staining.
- Sanded vs. Unsanded Grout:
- Sanded Grout: Contains fine sand particles, providing added strength and stability. It’s typically used for wider grout lines, as the sand helps prevent cracking and shrinkage.
- Unsanded Grout: Lacks sand and is smoother in texture. It’s used for narrower grout lines and on delicate or polished surfaces to avoid scratching.
Functions of Grout:
- It Fills Gaps: Grout fills the spaces between tiles or masonry units, creating a cohesive and aesthetically pleasing surface.
- It Supports and Secures Tiles: It provides structural support to tiles, holding them in place and preventing movement or displacement.
- It Prevents Water Seepage: Properly applied grout helps seal the gaps between tiles, preventing water and moisture from seeping through and potentially causing damage.
- It Enhances Aesthetic Appeal: Grout color can be chosen to either blend in with the tiles for a seamless look or to contrast with them for a decorative effect.
- It Strengthens Installation: By filling the spaces between tiles, grout helps distribute pressure and load evenly across the surface.
- It Covers Irregularities: Grout can be used to hide minor irregularities or size variations in tiles, ensuring a more even and professional finish.
Application: Applying grout involves mixing the appropriate type with water (or other recommended mixing agent), spreading it evenly over the tiled surface, and then wiping away any excess before it dries. Proper application is crucial for achieving a durable and aesthetically pleasing result.
Maintenance: Grout requires regular cleaning and, in some cases, sealing to maintain its appearance and effectiveness. This is particularly important in areas exposed to moisture, such as showers or kitchens.
Overall, grout is an essential component in many construction and interior design projects, ensuring the stability, integrity, and aesthetic appeal of tiled surfaces.
Why Clean Tile Grout?
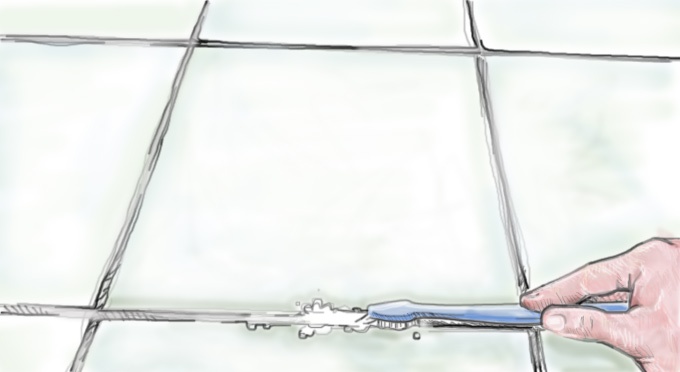
It’s pretty easy to mop the tops of each tile, but getting down into the cracks can pose a real problem. Most regular tools will slide right over the top, and will completely miss the grout. You may even find more dirt and grime deposited after cleaning, than you did before you started. The material is very porous so it holds onto stuff well, and makes it difficult to remove.
When soap scum, mildew and other yucky stuff are allowed to stay in the lines, it will discolor over time, and then become unhealthy as it’s allowed to cake and build up. Getting the lines clean will make the whole room look better, but it will also eliminate hidden dangers at the same time. You may need a better tool to make the job easier, but you may also be able to combine stuff you already have in order to save a few bucks. Unless you like to bathe or cook in a grime ridden germ hole, it’s very important to clean each tile and the grout that surrounds it.
Dirty Bathrooms Create Health Risks
If ignored, and left alone, all of that dirt may start to affect the people that encounter it. Asthma and allergies can be triggered. Skin, eyes and lungs may be irritated, and in some rare situations, serious diseases can be found lurking within the mold and mildew. It is well documented that mold is bad for you, and the longer it’s allowed to sit, the more potential for danger, and the more difficult it will be to get off. Some varieties are more dangerous than others, but they all look bad, and even the most benign can be irritating to some people.
For those allergic to the grime encountered in this area, it is common to see runny noses, itchy eyes, coughs, sneezes and throat irritation as a response. In some cases, it will manifest in a more chronic and severe manner to become asthma or some other long term condition. When substances in the grout lines don’t cause full blown allergic reactions, they may just irritate in an annoying way.
This can lead to unexplained headaches, fatigue, trouble catching your breath, concentration problems, nausea and more. The most rare problems caused by dirty grout lines are the ones brought about by invasive diseases. This is not at all common, but it is a risk in some extreme cases. Typically these powerful germs can only compromise those with already lowered immune systems.
Cases of asthma have skyrocketed all over the country, and one of the easiest ways to protect yourself and your family is to keep things clean, but also stick with products that don’t add to the problem. If you use harsh chemicals to fry the dirt, you may be doing as much harm as good due to the harsh, toxic ingredients.
The tips and cleaning methods below will help you to do a good job without resorting to dangerous products that may cause even more irritation that the stuff you’re trying to remove. Keep reading to learn about several proven ways to accomplish this task, and feel free to add your own in the comments section if there is anything we missed.
Why Is Grout So Hard To Clean?
Grout can be challenging to clean for several reasons:
- Porous Nature: Grout is typically porous, which means it has tiny openings that can trap dirt, moisture, and stains. This porosity makes it susceptible to collecting and retaining debris over time.
- Location and Use: Grout is commonly used in areas like kitchens, bathrooms, and entryways, where it’s exposed to a lot of foot traffic, moisture, and spills. This makes it more prone to staining and dirt buildup.
- Mold and Mildew: Grout’s porous surface can create an ideal environment for mold and mildew to grow, especially in damp or humid areas. Mold and mildew can penetrate the grout, making it more challenging to remove.
- Uneven Surface: Grout lines often have an uneven surface with crevices and irregularities. These irregularities can make it difficult to clean thoroughly, as dirt can become lodged in the tiny gaps and be hard to reach with standard cleaning tools.
- Improper Sealing: If grout isn’t properly sealed after installation or if the sealant deteriorates over time, it becomes more vulnerable to staining and moisture penetration.
- Aging: Over time, grout can deteriorate and become more porous, which makes it even more susceptible to staining and harder to clean.
Tips for Cleaning Grout:
While grout can be challenging to clean, it’s not impossible. Here are some tips to make the cleaning process more effective:
- Regular Maintenance: Clean grout regularly to prevent dirt and stains from building up. Sweeping or vacuuming tiled floors and wiping down tiled surfaces can help.
- Use the Right Products: Choose a cleaning solution specifically designed for grout cleaning. Avoid harsh chemicals that can damage the grout or tiles.
- Pre-Treat Stains: For stubborn stains, pre-treat the grout with a paste made from baking soda and water. Apply the paste, scrub gently, and let it sit for a while before rinsing.
- Agitate and Scrub: Use a stiff-bristle brush or an old toothbrush to scrub the grout lines. Scrubbing helps dislodge dirt and stains from the porous surface.
- Steam Cleaning: Steam cleaners can effectively clean grout by using high-temperature steam to break down stains and grime. This method is less abrasive than scrubbing.
- Seal the Grout: After cleaning, consider applying a grout sealer to protect the grout from future staining and moisture penetration.
- Professional Cleaning: For deeply stained or heavily soiled grout that doesn’t respond to regular cleaning methods, consider hiring a professional tile and grout cleaning service.
- Prevention: Use doormats at entryways, clean up spills promptly, and use proper ventilation in areas prone to moisture to reduce the likelihood of grout staining.
Remember that consistency is key when it comes to keeping grout clean. Regular cleaning and maintenance can help prevent tough stains and make future cleaning efforts more manageable.
Top 5 Ways To Clean Grout
1. Use Chlorine Bleach and Baking Soda
This is one of the most harsh methods we will list, so best to get it out of the way. We would recommend trying the other techniques first, and then resorting to this if necessary. Bleach can be an irritant to some, and should not be on your skin for any amount of time, but many people swear by it, and prefer it for this job. If you choose to try this method, be sure to use proper precaution with the chlorine bleach. Because it will distort colored grout, you should only use this stuff on white or lighter colored lines, or those that you do not mind changing colors.
- To prepare your cleaning solution, get a bucket, and add in 2 cups of baking soda.
- Measure out 1 cup of bleach and add to the baking soda.
- Use a stick or ruler to mix the two ingredients together, and continue until you have a paste.
- Grab a toothbrush and dip into your paste to apply some to the bristles. A larger, more powerful brush may make the job easier.
- Do one section at a time and allow to sit for 15-20 minutes.
2. Use Oxygen Bleach
Similar to chlorine, but safer, and generally more effective on grout. It works on all sorts of stains, and will usually provide better results than professional steam machines. It’s a general purpose cleaning product made from a combination of soda ash and hydrogen peroxide. When mixed with warm water, it becomes activated and offers a powerful cleaning solution that works well with added scrubbing. The oxygen will break down organic build up to make it easy to release it from the surface and lift it away. Although it is a bleach, it will not harm color like the chlorine stuff does. It’s also less toxic and therefore safer for you and your pets.
- To prepare for cleaning, mix an amount with warm water according to the instructions on the package. It will totally dissolve once mixed in.
- Pour the solution you made directly onto the floor.
- Continue pouring until all grout lines are flooded.
- Once the floor is saturated, let sit for 15-30 minutes. As it sits, it will do the work for you by breaking down the grime.
- If your cleaning solution absorbs or sinks in, add more. The area should remain wet.
- After 30 minutes, use a scrub brush to clean the lines.
- For maintenance after you get it clean, add a smaller amount of oxygen bleach to your water every time you mop.
3. Use A Homemade Cleaning Solution
Want to make a similar substance with stuff you already have? A simple home remedy can do a pretty good job if you also have a good tool. It will be pretty tough to get grout clean without any effort, no matter which method you go with, but skipping a trip to the store will at least reduce the time it takes. When you use a simple list of ingredients you already have at home, you can be sure it is safe and non-toxic, and you can mix the exact amount you need at a very affordable price. When applied with a good scrub brush, the following solution has been proven to remove soap scum, mold and other stuff without much trouble.
- To get ready, mix your solution in a sink or bucket.
- Begin with warm water and then add in 1/4 cup of white distilled vinegar.
- Mix in some lemon juice for scent and acidity. 1/3 cup.
- Combine this liquid with about 1/2 cup of baking soda.
- The ingredients will immediately react and bubble. Wait until it settles.
- Once calm, add to a spray bottle for walls, leave in a bucket or apply right to the tile for floors.
- Once applied, let it sit for 5 or more minutes.
4. Use A Steam Cleaner
This method is probably the most expensive, but it also might be the easiest. For regular build up these machines can be quite effective, but when the grime is caked or on there for long periods, they may not provide the scrubbing power necessary to get the floor clean. No t many people could justify a outright purchase, but a one day rental may help you improve the look of your grout. Most home improvement stores offer rental machines that you can get your hands on locally. It won’t do you much good for tile on the wall, and it would be pretty silly to use in a small room. This method is best used for large sections of tiled flooring.
- Once you get the machine home, be sure to set up according to the instructions.
- Fill the machine with water, and then turn the power on.
- Allow it time to reach the proper temperature.
- Begin at one side of the room, and move toward the other. As you move make sure the brush makes contact and continue in a forward motion.
- As you reach the other side, turn directly around, and continue in a line parallel to the one you just made.
- Keep steaming until you get the results you want. It may be necessary to go over certain areas more than once.
- Use a mop or cloth to soak up any residual moisture and wipe clean any residue or debris.
- Turn off machine and allow to cool.
5. Use a Tile Cleaner From The Store
Specifically formulated cleansers can be very effective, but they can also be pretty expensive. Also, it may be tough to find one that is safe for the surface you are cleaning, but also effective on the grime you’re trying to remove. When purchasing a tile and grout cleaner at the store, take care to investigate the ingredients, and be sure to get one that’s compatible with your bathroom. You’ll want to follow all manufacturer warnings and instructions when using this method because each product may include a different list of active ingredients.
- Use proper protective clothing and gear.
- Apply the cleaner as directed by the manufacturer.
- Make sure to rinse thoroughly afterward.
General Grout Cleaning Instructions
Cleaning tile grout effectively requires the right tools, products, and techniques. Not every situation will require the exact same steps to get the job done, but once you choose the stuff you’ll be cleaning with, the actual process will be pretty similar. Make sure to adjust as needed for the exact method and conditions for best results. Here’s a step-by-step guide on the best way to clean tile grout:
Materials and Tools Needed:
- Grout cleaner (commercial or DIY)
- Baking soda
- Vinegar
- Hydrogen peroxide (optional)
- Hot water
- Stiff-bristle brush or an old toothbrush
- Microfiber cloth or mop
- Grout sealer (optional)
- Safety goggles and gloves (if using commercial cleaners)
Instructions:
- Preparation:
- Ventilate the area by opening windows or using fans, especially if you’re working with commercial grout cleaners, which can emit fumes.
- Put on safety goggles and gloves if you’re using commercial cleaners to protect your eyes and skin.
- Sweep or Vacuum: Start by removing loose dirt and debris from the tiled area. Sweep or vacuum the floor thoroughly to prevent dirt from being spread around during cleaning.
- Choose a Cleaning Solution:
- You have several options for cleaning solutions:
- Commercial Grout Cleaner: Choose a grout cleaner from the store that is specifically designed for your type of grout and tile. Follow the manufacturer’s instructions carefully.
- Bleach and Baking Soda Paste: Mix one cup of bleach into two cups of baking soda to create a powerful cleaning paste that eliminates staining.
- DIY Baking Soda Paste: Mix baking soda and water to create a thick paste. This is a gentle, natural option for light cleaning.
- Oxygen Bleach: Mix according to the instructions provided.
- Homemade Cleaner: Mix together vinegar, water, lemon juice and baking soda to create the perfect safe cleaner.
- Vinegar and Water: Mix equal parts of white vinegar and hot water. This solution is effective for general cleaning and disinfecting.
- Hydrogen Peroxide: For tougher stains, you can use hydrogen peroxide mixed with water (1 part peroxide to 1 part water).
- You have several options for cleaning solutions:
- Apply the Cleaning Solution:
- Using a spray bottle or a sponge, apply the chosen cleaning solution directly onto the grout lines. Ensure that the grout lines are completely saturated but not excessively soaked.
- Let the Solution Sit: Allow the cleaning solution to sit on the grout for 5-10 minutes (or follow the instructions on commercial cleaners). This dwell time helps to break down dirt and stains.
- Scrub the Grout:
- Use a stiff-bristle brush or an old toothbrush to scrub the grout lines vigorously. Scrub in a back-and-forth or circular motion to dislodge dirt and stains.
- For stubborn stains, you can dip the brush in the cleaning solution or sprinkle a little baking soda on the grout lines for added abrasion.
- Rinse Thoroughly:
- Wipe away the cleaning solution with a microfiber cloth or mop. Rinse the area thoroughly with clean water to remove any residue. Change the water frequently to ensure you’re not spreading dirt around.
- If you used a commercial cleaner, it’s essential to rinse the area thoroughly as per the manufacturer’s instructions to remove any chemical residue.
- Dry the Area: Use a clean, dry microfiber cloth or mop to dry the grout lines and tiles. Make sure the grout lines are completely dry to prevent mold and mildew growth.
- Seal the Grout (Optional):
- If desired, apply a grout sealer to protect the cleaned grout from future stains and moisture. Follow the sealer’s instructions carefully.
- Regular Maintenance:
- To keep grout clean, sweep or vacuum regularly, and promptly clean up spills to prevent staining.
Regular cleaning and maintenance can help keep your tile grout looking clean and pristine. Depending on the traffic and usage of the area, you may need to clean and reseal the grout periodically.
Extra Tips
- Choose your tool based upon the durability of the tile.
- Always use a good scrubber for fast and easy results.
- Fresh dirt is easier to clean than old stuff. Clean regularly, and tackle tough stains right away to make the job easier.
- Grout sealer can be applied to keep it clean longer. Put on according to direction once fully cleaned.
- If using chlorine bleach, ensure that you open a window, turn on an exhaust fan or ventilate in some way.
- Gloves should also be worn when handling chlorine bleach.
- Using a steam machine on grout that is cracking or broken may cause problems. Avoid this.
A Good Tool Makes For Easy Cleaning
Using a better grout brush will save time, reduce effort, and make the job easier. It’s nearly impossible to thoroughly clean the lines between each tile without a brush of some sort, and all of them are not created equal. Shape, size, material and durability all play a role in making one tool better or worse than another.
For the quickest job with the best results, you will want a tough scrubber that doesn’t wear out. A brush that works as a hand tool or one with a long pole will increase convenience and allow you to reach areas that are high up, or far away. You also make it possible to switch to floors or tiles without using something different, or resorting to awkward stretching or straining.
We carry some of the best grout cleaning tools available, but anything similar will also work. Be careful when shopping elsewhere though because most other tools are flimsy and prone to bending or smashing to become ineffective.
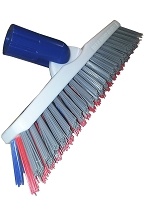 The Shark Grout And Tile Brush
This red, gray and blue brush has some of the stiffest bristles you will find. It’s a commercial grade tool that features unique bristles angles to make it easy to use, and also allow it to clean the top of each tile as it removes everything from the lines. It points outward at each end, so you can scrub right up to the edges, and it has a triangular shape underneath to dig deep down into any size grout line. A swivel attachment at the top can be used to connect a mop or broom pole for added reach, but it folds flat for comfortable use when gripped with a single hand. Quickly lift up tough grime with a simple back and forth motion and almost no pressure. It’s safe for any cleaning solution, but it does most of the work for you, so the cleaner used is less important.
 Demon Pro Grout Brush
Similar to the shark, but with more advanced bristles at the center, and longer bristles overall. Get professional looking results with little effort, and use a tool that doesn’t wear out. This brush is red, gray and black and features the same angles and shaping as the one mentioned above. This means that it will also clean tile and grout with one motion, and allow you to scrub right up to baseboards without extra effort. You can attach it to a pole in the same way also, so high sections of walls are easy to reach, and doing a whole floor does not require to get down on your hands and knees. Nylo-Grit bristles at the center are more durable and more flexible than regular nylon, and they have more cutting power thanks to the silicon carbide extruded throughout. Bend and flex to get every crack and crevice, and power through dirt with the high performance bristles.
Prevent Dirty Grout Lines In The Future
If the grout never gets dirty, you’ll never have to clean it. Although it’s not realistic to keep it clean and new-looking forever, you can take steps to ensure that your tile grout stays clean for as long as possible. Preventing dirty tile grout involves a combination of regular cleaning, proper maintenance, and proactive measures. Here are some effective strategies to keep your tile grout looking clean and well-maintained:
- Seal Grout: Apply a quality grout sealer after the initial installation and periodically thereafter (every 6 months to a year). This helps create a protective barrier that repels stains and moisture.
- Clean Spills Promptly: Wipe up spills as soon as they occur to prevent them from seeping into the grout lines and causing stains.
- Use Mats or Rugs: Place mats or rugs at high-traffic entry points, in front of sinks, and in areas where spills are more likely. These catch dirt, debris, and moisture before they reach the grout.
- Avoid Harsh Cleaners: Some cleaning products can be abrasive and may damage or discolor grout over time. Stick to pH-neutral or grout-friendly cleaners for regular maintenance.
- Regular Sweeping or Vacuuming: Dust and debris can settle in grout lines over time, so make sure to sweep or vacuum the tiled area frequently to prevent buildup.
- Avoid Using Bleach: While bleach can be effective for cleaning, it can also weaken grout over time. Opt for gentler cleaning solutions like baking soda and water, or commercial grout cleaners.
- Use Grout-Friendly Brushes: When cleaning, use a soft-bristle brush, an old toothbrush, or a grout brush specifically designed for grout cleaning. Avoid using metal brushes, as they can damage the grout.
- Ventilate Humid Areas: Ensure proper ventilation in areas prone to high humidity, like bathrooms and kitchens. This helps prevent mold and mildew growth, which can quickly discolor grout.
- Avoid Dark-Colored Grout: If possible, choose lighter-colored grout. Dark-colored grout tends to show dirt and stains more visibly.
- Reapply Sealer as Needed: Over time, the protective seal on grout can wear off. Keep an eye on the grout’s appearance and reapply sealer as necessary.
- Regularly Inspect and Repair Grout: Check grout lines periodically for signs of wear, cracks, or missing grout. Promptly repair any damaged areas to prevent further deterioration.
- Avoid Standing Water: In areas with tiles (like bathrooms), ensure that water doesn’t pool or stand for extended periods. Proper drainage and regular wiping can help prevent water damage to grout.
- Be Gentle with Grout: Avoid using abrasive tools or harsh scrubbing motions when cleaning grout. Gentle but consistent cleaning is usually the most effective.
By incorporating these preventive measures into your regular cleaning routine, you can significantly reduce the likelihood of dirty or discolored grout. Remember, consistent care and maintenance are key to preserving the appearance and integrity of your tile grout.
4 Comments To "5 Effective Ways To Clean Tile Grout"
#1 Comment By Daphne Gilpin On 06/07/2019 @ 1:45 PM
Thanks for explaining that the dirt in the tile grout can lead to health risks like triggering asthma and allergies. My husband and I have a lot of tile on our bathroom and kitchen, and I know I’ve never taken the time to clean the grout. I’m glad I read your article because now I know why hiring a grout cleaning service would be worth the cost.
#2 Comment By rachel frampton On 11/22/2019 @ 4:34 PM
One of the most disgusting parts of cleaning our tiles is removing the grout, but the thing is, no matter what I do I still can’t remove the dirt in it. It’s surprising to learn that when gout wasn’t cleaned, it may cause health hazards such as Asthma and allergies. I guess it’s best if I’ll just hire a gout cleaning service to avoid that kind of problem.
#3 Comment By Kate Hansen On 02/24/2020 @ 5:28 PM
I like how you suggested using bleach to clean it. My husband and I just recently moved into a new home that mostly has tile flooring, and I wanted to know how to clean it correctly. My new job keeps me very busy though so I might have to hire a professional to help with keeping it clean. I’ll make sure to keep this information in mind if I do decide to clean the tile on my own in the future.
#4 Comment By Hannah On 03/15/2020 @ 3:42 AM
Steam Cleaner is so effective but highly expensive the product. mas people are not effort the tools.