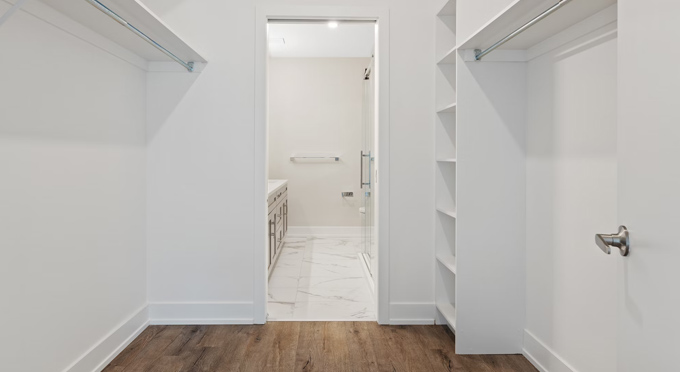
Closets often bear the brunt of clutter, chaos, and disorganization in our homes. If you’ve ever opened your closet doors and felt overwhelmed by the chaos within, it’s time for a fresh start. This step-by-step guide will show you how to clean and organize your closets, turning them into efficient and inspiring spaces that make your daily routine more manageable. Get ready to roll up your sleeves and transform your closets into organized havens.
Step 1: Prepare Mentally
Before diving into the closet cleaning and organizing process, prepare yourself mentally. Recognize that this task will take time, so be patient with yourself. Imagine the satisfaction of opening your closet doors to a clean, organized space, and use this as motivation.
Step 2: Declutter
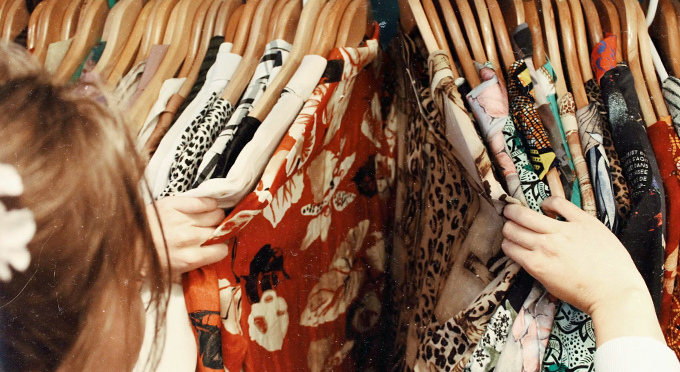
The first crucial step is decluttering. Empty the entire closet, one at a time, and go through every item. Create three piles: Keep, Donate, and Discard. Be ruthless and ask yourself if each item serves a purpose or brings you joy. Don’t hold onto items out of guilt; keep only what you truly need or love.
Decluttering is a critical aspect of the closet cleaning and organizing process. It’s about simplifying your life by eliminating items that no longer serve a purpose, are out of style, or have simply accumulated over time. Here are some more tips for effective decluttering:
- The One-Year Rule: If you haven’t used or worn an item in the last year, it’s a strong indicator that you can part with it. This rule helps you let go of items you’ve outgrown or no longer need.
- Sentimental Items: Sentimental items can be tricky, so if you’re struggling to let go of something for sentimental reasons, consider taking a photo of it before donating or discarding. This way, you can preserve the memory without the clutter.
- Keep Only What Fits: Clothing that no longer fits can be a source of clutter. Keep items that fit your current size and style, and let go of the rest. Holding onto clothes that no longer fit can be discouraging and take up valuable space.
- Duplicates: Review your collection for duplicate items. You don’t need three similar black shirts or six identical mugs. Choose your favorites and pass the extras on.
- Broken or Unusable Items: If you have items that are broken or no longer usable, it’s time to say goodbye. Don’t hold onto something with the intention of fixing it if you haven’t done so in a reasonable time frame.
- Consider the “KonMari” Method: Made famous by Marie Kondo, the KonMari method encourages you to keep only items that “spark joy.” Holding each item in your hands and assessing your emotional connection to it can be a helpful decluttering strategy.
- Small Steps: If the thought of decluttering your entire closet is overwhelming, start with smaller sections. Tackle one shelf or one clothing category at a time to make the process more manageable.
Remember that decluttering is a continuous process, not a one-time event. Regularly assess your belongings and let go of items that are no longer needed or no longer bring you joy. This will help maintain an organized and clutter-free closet.
Step 3: Deep Clean
Once your closet is empty, seize the opportunity to deep clean. Dust, vacuum, and wipe down shelves and walls. A clean space is the foundation of an organized closet.
Deep cleaning your closet is an essential step in maintaining an organized and clutter-free space. Here are some additional tips for a thorough closet deep cleaning:
- Empty the Closet: To begin, completely empty the closet. This allows you to see every nook and cranny and ensures that nothing is overlooked.
- Dust and Vacuum: Dust all surfaces inside the closet, including shelves, rods, and the floor. Use a microfiber cloth or a duster to capture dust effectively. Vacuum the closet floor to remove any loose dirt and debris.
- Wipe Down Surfaces: Use a damp cloth or an appropriate cleaning solution to wipe down the closet’s interior surfaces, including shelves, rods, and walls. This helps remove any built-up grime and ensures a clean foundation for your organized items.
- Check for Mold or Mildew: Inspect for any signs of mold or mildew, especially in areas prone to moisture. If you find any, clean it with a mixture of equal parts water and white vinegar or a specialized mold cleaner.
- Repair and Maintenance: While your closet is empty, check for any damaged or loose components. This includes broken shelves, loose brackets, or malfunctioning lighting. Make necessary repairs or replacements.
- Consider Fresh Paint: If your closet interior is looking worn and dingy, a fresh coat of paint can make a significant difference. Opt for a light color to brighten up the space.
- Invest in Closet Organizers: To maintain your closet’s organization, consider investing in closet organizers, such as bins, baskets, and storage solutions. These can help keep items neatly arranged and prevent future clutter.
- Rotate Seasonal Items: If you have limited space, it’s a good practice to rotate your seasonal clothing and accessories. Store off-season items in a separate location, such as under the bed or in the attic, to free up space in your closet.
- Don’t Forget the Door: Clean both the interior and exterior of the closet door, as well as the doorknob or handle.
- Reorganize Thoughtfully: As you return items to the closet, do so thoughtfully. Arrange your clothing by type, color, or frequency of use, depending on what makes the most sense for you. This step will help maintain the order in your closet.
Deep cleaning your closet periodically, ideally once or twice a year, will keep it in top shape and make it easier to find and access your belongings. It’s an investment in maintaining an organized and clutter-free living space.
Step 4: Assess and Plan
Take a moment to assess your needs and how you want to utilize your closet space. Consider using closet organizers, such as shelves, drawers, hanging rods, and storage bins, to maximize efficiency.
Step 5: Reorganize and Reintroduce Items
Carefully organize your keep items back into the closet. Group similar items together, such as clothing, accessories, or shoes. Use clear containers or labeled bins for smaller items to keep everything easily accessible.
Step 6: Use Vertical Space
Utilize the vertical space in your closet to make the most of it. Install hooks, additional shelves, or hanging organizers. This maximizes storage without cluttering the floor.
Step 7: Rotate Seasonal Items
To prevent overcrowding, consider rotating seasonal clothing and accessories. Store out-of-season items in under-bed storage containers or in another part of your home.
Step 8: Label Everything
Labels are your best friend. Use them to identify the contents of bins, shelves, or boxes. This makes it easy to find what you’re looking for without rummaging.
Labeling is an effective organizational strategy that can make a significant difference in keeping your closet clutter-free and easy to navigate. Here’s more on the importance of labeling and how to go about it:
Why Labeling Matters:
- Easy Identification: Labels allow you to quickly identify what’s stored in each container or section of your closet. This is especially helpful if you have multiple bins, boxes, or shelves.
- Time-Saving: When everything is clearly labeled, you’ll spend less time searching for items. Labels help you access what you need with minimal effort.
- Maintaining Organization: Labels act as a visual reminder of where items belong. This encourages you and others in your household to return things to their designated spots, preventing clutter from building up.
- Personalized Organization: You can create labels that are customized to your needs. Whether you prefer to sort items by season, color, or type, labels make it clear.
How to Label Effectively:
- Choose a Labeling System: Decide on a labeling system that works for you. This could be as simple as using masking tape and a marker or investing in label maker equipment for a more professional look.
- Be Consistent: Use a consistent format for your labels. For instance, if you’re labeling bins, use a clear and large font for easy reading.
- Use Descriptive Labels: Make labels as descriptive as possible. Instead of “Clothes,” specify “Winter Sweaters” or “Summer Shoes” to provide clarity.
- Include Dates: If you rotate seasonal items, consider including dates on the labels. This way, you’ll know when it’s time to switch items.
- Placement: Ensure that labels are placed where they’re easily visible. For bins, attach labels to the front or top. For shelves, attach labels to the edge or front.
Remember that labeling is a flexible system. You can adapt it as your closet’s contents change, and it’s easy to update or replace labels as needed. The key is to make it a consistent part of your organization routine to maintain a tidy and clutter-free closet.
Step 9: Keep It Neat
Maintaining an organized closet is an ongoing process. Regularly assess your closet and remove items you no longer need. Return items to their designated spots after use.
Keeping your closet neat is essential for maintaining an organized and clutter-free space. Here are some additional tips on how to achieve and sustain a neat closet:
- Regular Maintenance: Make it a habit to perform regular check-ins on your closet, and set aside time each season to assess the contents, declutter, and reorganize as needed. This helps prevent the accumulation of unnecessary items.
- One In, One Out Rule: For every new item you bring into your closet, consider removing one that you no longer need or use. This ensures that your closet doesn’t become overcrowded.
- Hangers and Hooks: Invest in quality hangers and hooks to keep clothing items, bags, and accessories well-organized. Using uniform hangers not only looks neater but also prevents clothes from slipping off.
- Fold Strategically: Some items, like sweaters or T-shirts, are best folded instead of hung. Use shelf dividers or organizers to maintain neat stacks.
- Shoe Racks: Shoe racks or clear shoeboxes can help keep footwear organized and visible. This prevents shoes from getting scattered around the closet.
- Utilize Shelf Dividers: If you have shelves, use dividers to keep stacks of clothes or accessories from toppling over. This creates a neater and more accessible storage system.
- Baskets and Bins: Small storage containers can be used to corral items like scarves, belts, or hats. Labels on these containers help maintain a tidy appearance.
- Color Coding: Organize your clothing items by color for a visually pleasing and easily navigable closet. This system also makes it quicker to find specific items.
- Keep the Floor Clear: Avoid piling items on the closet floor. Use hooks, shelves, and storage bins to keep the floor space clutter-free.
- Cleaning Supplies: Keep cleaning supplies handy for occasional dusting and maintenance within the closet. A clean and fresh-smelling closet is a more inviting space.
- Evaluate and Edit: Every so often, evaluate the necessity of each item in your closet. If you haven’t worn something in over a year or it no longer fits your style, consider donating or selling it to maintain a streamlined closet.
- Efficient Layout: Arrange frequently used items at eye level or within easy reach. Less-used items can be stored on higher or lower shelves.
By incorporating these tips into your closet maintenance routine, you can keep your closet neat and organized, making it easier to find what you need and reducing the chances of clutter accumulation. Remember, it’s an ongoing process, so consistent effort is key to maintaining a tidy closet.
Step 10: Celebrate Your Achievement
Once your closet is clean, organized, and visually pleasing, take a moment to appreciate your hard work. The sense of accomplishment and the daily ease of finding what you need will be a constant reminder of your success.
Cleaning and organizing your closets may seem like a daunting task, but the rewards are well worth the effort. An organized closet not only simplifies your daily routine but also brings a sense of peace and order to your home. With patience, determination, and this step-by-step guide, you can transform your closets into organized havens and achieve a cleaner and more organized lifestyle.


 Ordering Info
 Customer Service
 Follow Us
 Search For Stuff
 Find Us
 Call Us
 Pay Us
0 Comments so far.
Use the form below to add your own thoughts or questions. Scroll down to read what other people had to say.